Just got your hands on Roadie 4? Let’s get you set up! Follow this simple guide to get up and running in no time.
Inside the box

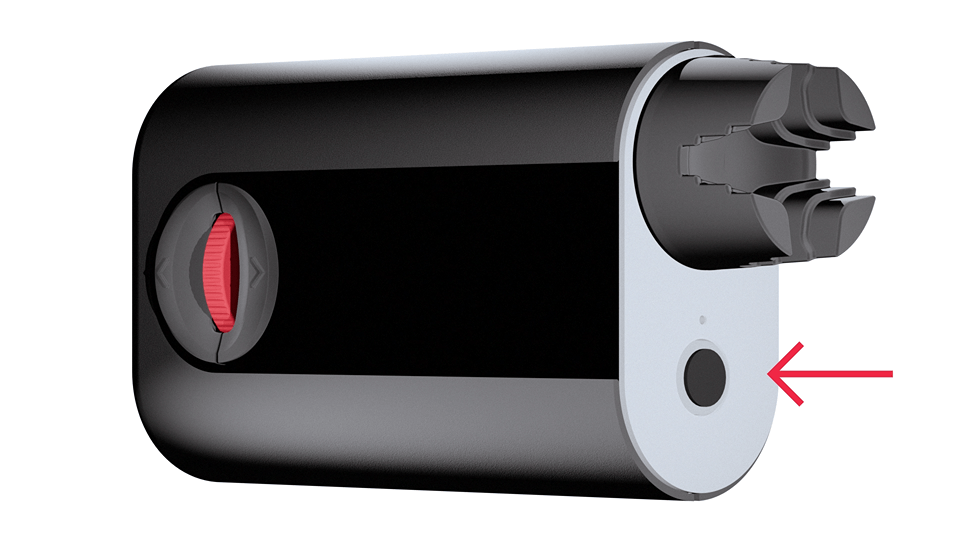
Get to know your Roadie

Power and recharging
To power on Roadie 4, press the power button once.
To power it off, press and hold the power button for 3 seconds.
Roadie 4 is equipped with a rechargeable LiPo 500 mAh battery that can tune up to 150 strings, good enough to last you a whole month on a single charge. It charges via USB-C, and while you can use any compatible USB-C charger, we recommend using the cable provided in the box for the best performance.
While charging, a red LED will light up. This changes to green once the device is fully charged.

Navigation
Roadie 4 has 2 buttons left (◀) and right (▶). Pressing the right or select button (▶) is used to select a certain menu or feature, while pressing the left or back button (◀) is used to exit and return to the previous selection.
In addition, Roadie 4 has been fitted with a scroll wheel that you can use to easily navigate up or down any menu.

STEP 1: Add an instrument
To begin tuning, the first step is to create an instrument profile directly on the Roadie 4.
Here’s how:
Turn on your Roadie 4 by pressing the power button
Go to Tuner > Add Instrument
Choose your instrument type
Select the number of strings
Name your instrument
Press and hold the right button to save
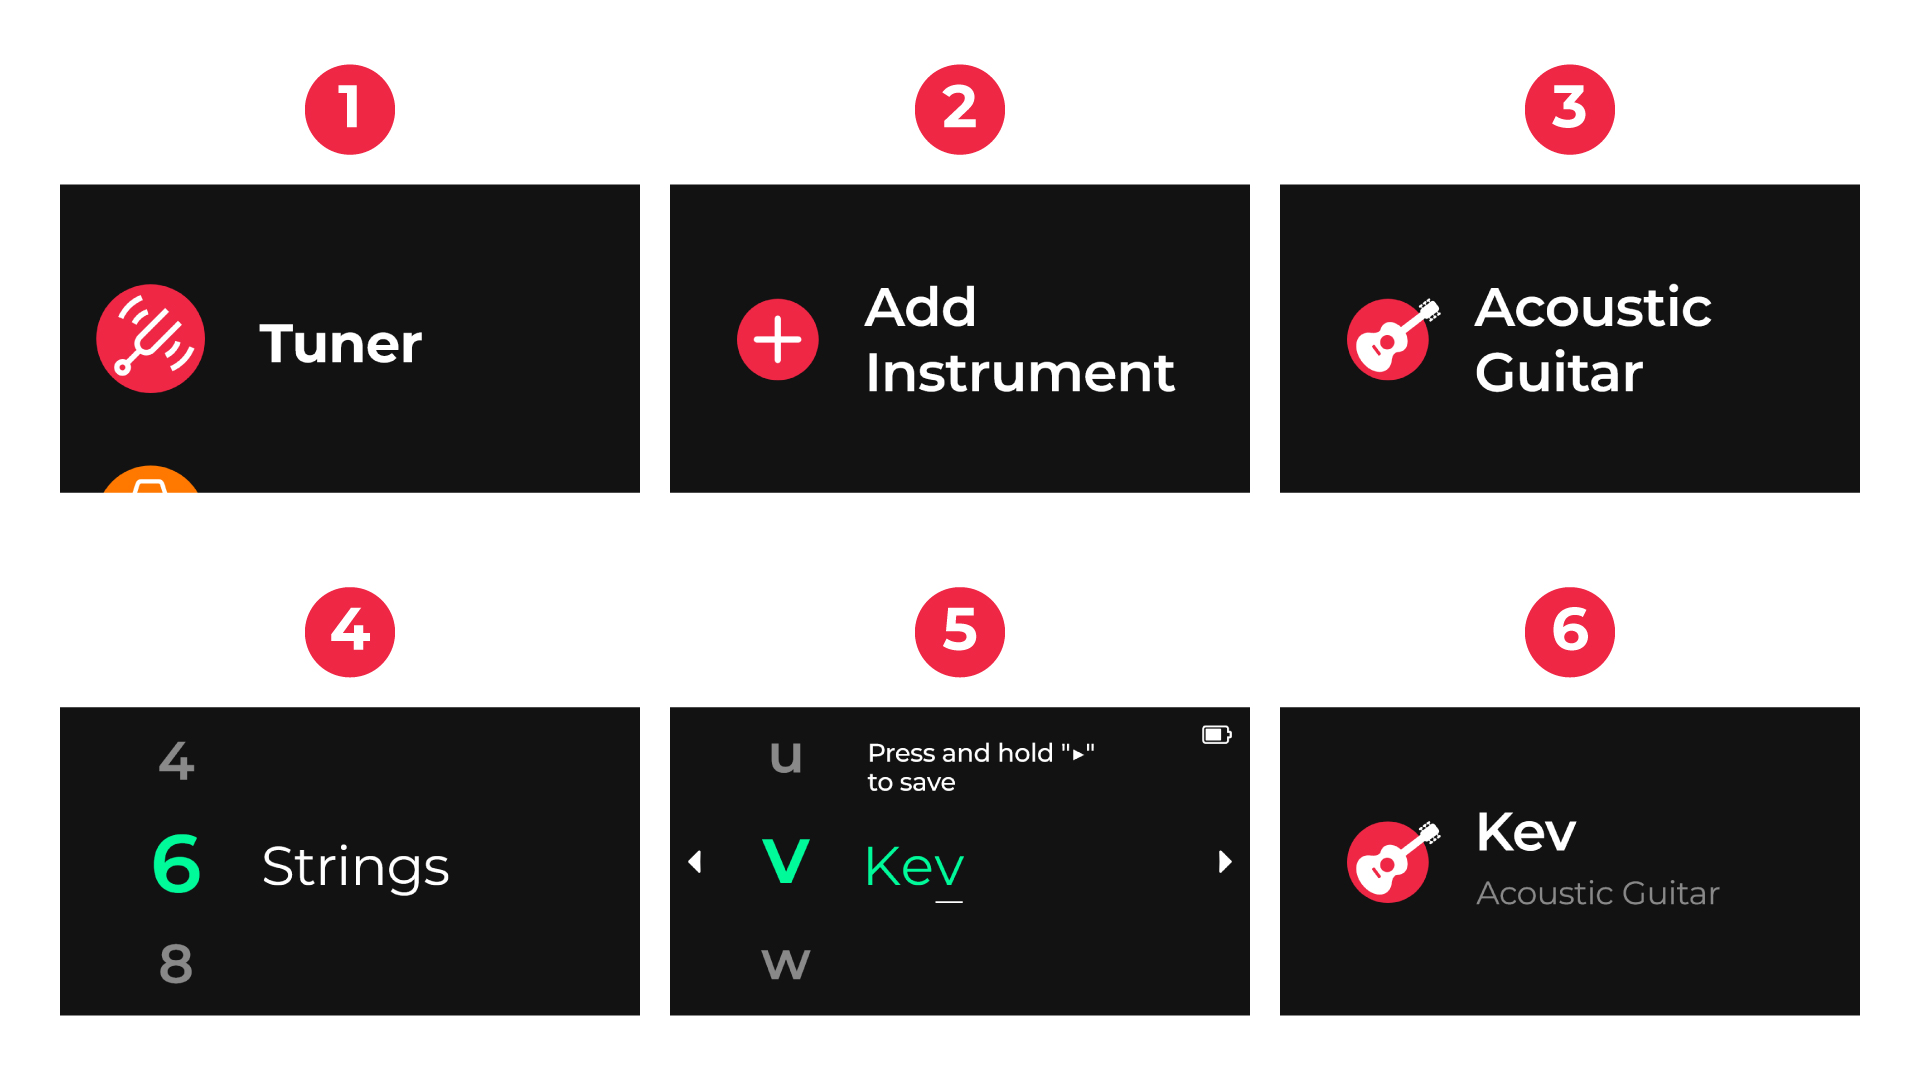
Your new instrument will be saved with a default Standard Tuning. For example, a 6-string acoustic guitar will default to E2 / A2 / D3 / G3 / B3 / E4. You can easily change this to another tuning or create your own custom tunings.
If you don’t see your instrument type listed, you can create a custom instrument using the Roadie Tuner mobile app.
Note: Even if you have multiple guitars of the same type, it’s important to create a separate profile for each one. This helps Roadie 4 learn the unique characteristics of each instrument and tune them more accurately over time.
STEP 2: Start tuning
Once you’ve added your instrument, you’re ready to start tuning. Here’s how:
Turn on your Roadie 4 and enter the Tuner menu
Select your instrument from the list displayed on the screen
By default, Roadie starts with the first tuning peg. For a standard 6-string guitar, that would be E2. But if you have Auto Detect enabled, then you don't have to tune in any particular order
Place the peg connector onto the tuning peg that matches the note shown on the screen
Pluck the string. Roadie’s motor will rotate the peg. Avoid plucking rapidly.
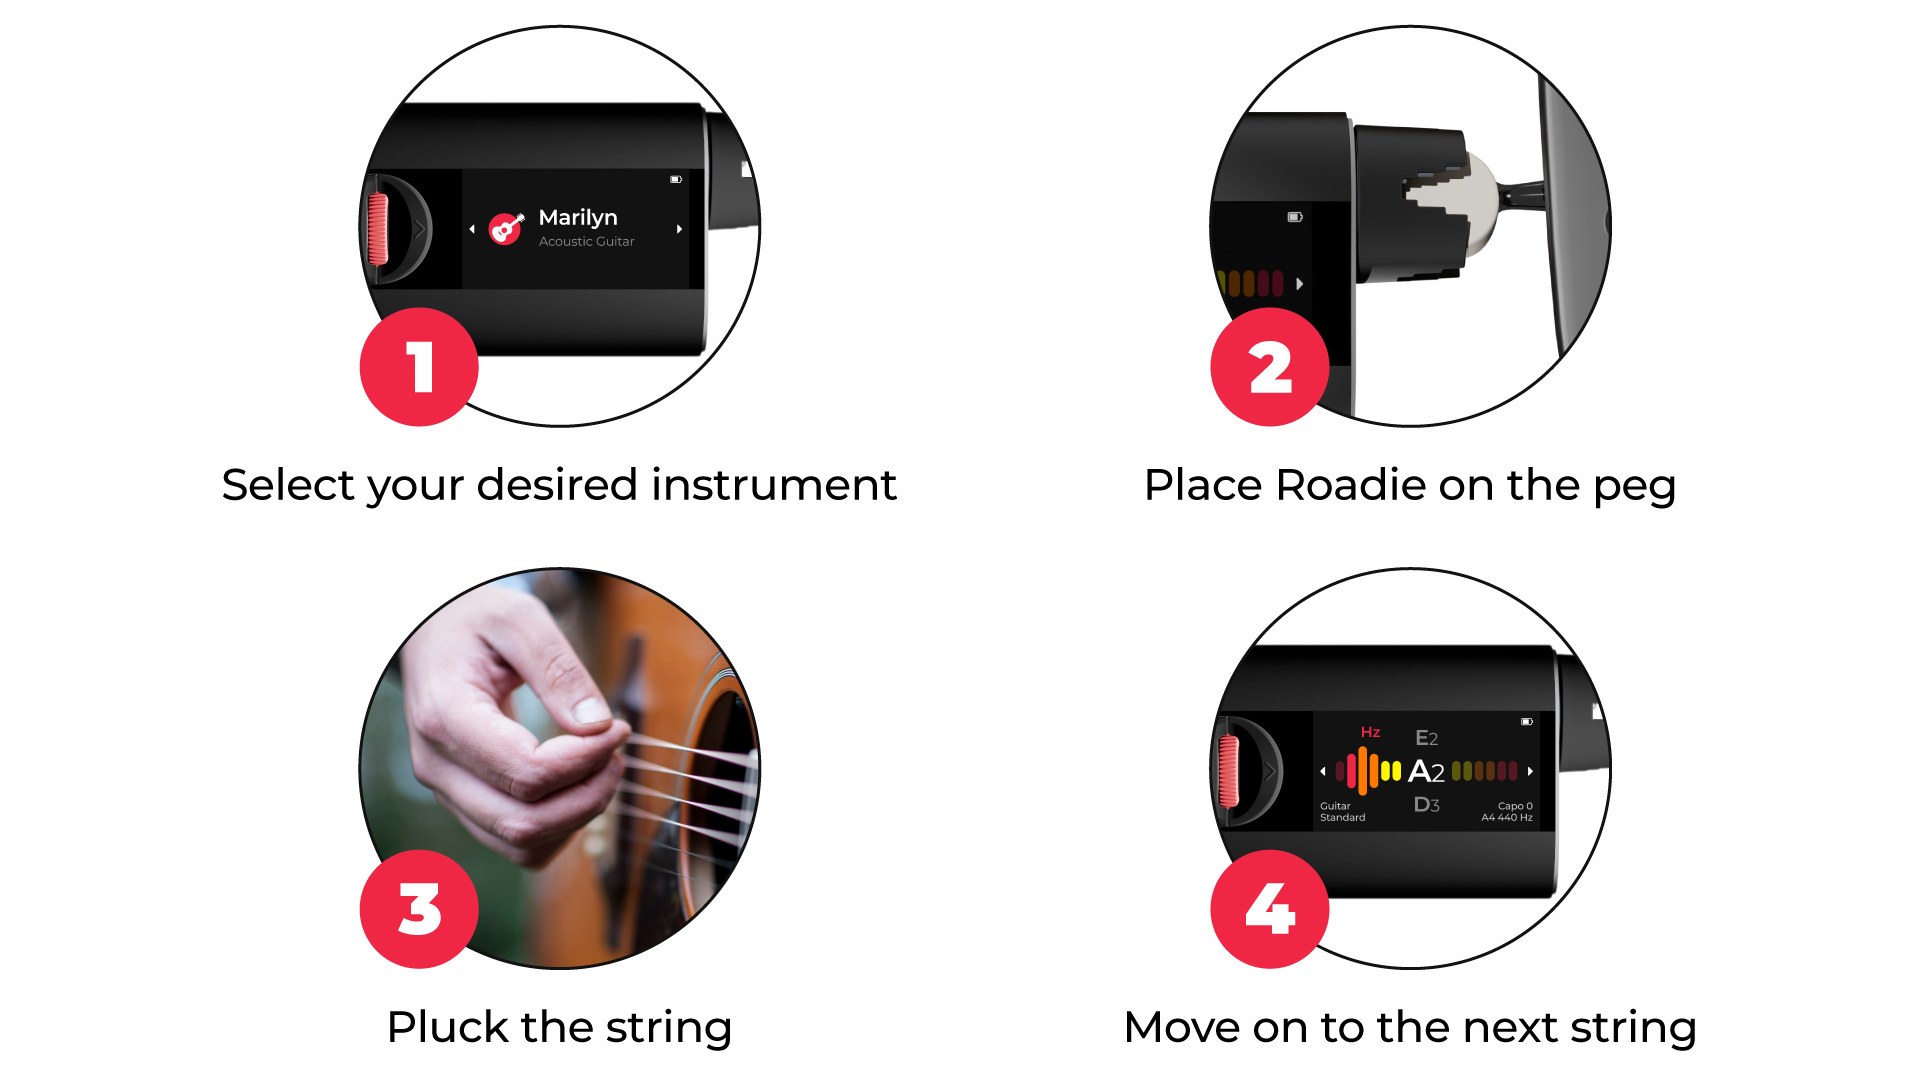
When tuning is complete, you’ll hear a beep, feel a vibration, and see the note turn green on the screen. If not, keep plucking slowly the string until it does. Once the string is in tune, Roadie will automatically move to the next note in the tuning. To turn off Roadie 4, long-press the power button for 3 seconds
That covers the basics. Now, you can explore a range of tuning settings to get even more out of your instrument. With Roadie 4, you can change your tuning and choose from over 150 built-in tunings, tune with a capo, enable Tune-Up mode, adjust the A4 reference pitch, switch to High Accuracy mode, and much more.
Combine Roadie 4 with the Roadie Tuner mobile app
Roadie 4 works seamlessly with the companion Roadie Tuner mobile app. The app is available for free on iOS and Android devices.
We highly recommend that you connect your device to the app to store and manage all your instrument profiles, easily create custom instruments and custom tunings, and receive firmware updates that include the latest features and improvements.
Note: The Roadie Tuner mobile app is NOT available on desktops or laptops. However, it is supported on MacBooks with an M1 chip or higher.
Additional features of Roadie 4
Roadie 4 is the smartest tuner on the market, and it packs powerful features to support your playing and maintenance routines, including Auto-Detect, a fully customizable Metronome and String Winder.
While tuning, you can even use this handy shortcut to tighten/loosen your strings directly in the Tuning screen:
- Select your instrument profile
- Hold the left/back button to unwind or the right/select button wind a string
- Once the string is tight enough, release the button to stop the wind/unwind process
- Resume tuning by plucking the string
That should be enough to get you started, but if you need any help, feel free to contact our support team at support@roadiemusic.com.
Was this article helpful?
That’s Great!
Thank you for your feedback
Sorry! We couldn't be helpful
Thank you for your feedback
Feedback sent
We appreciate your effort and will try to fix the article